Transmedia

For this project, I volunteered to run a semi-self guided workshop on the basics of 3D modelling within Blender. Utilising the two monitors that each computer has, we will have a set of instructions that the guests can follow to create their model on one screen and the Blender window on the other. The model guests will have the opportunity to make is a basic, 1950’s style toy robot. I originally planned to make multiple models but I decided it should be more focused and it was more important to have better instructions for one model than multiple choices since the guests will likely be trying this software for the first time and we do not want to overwhelm them. I also made this decision as I feel a toy robot is the best model for a beginner to make that is easy enough, allows the guest to try a range of simple techniques and means that they will feel a sense of achievement with the result without having to use techniques that are beyond their ability. Also just because the guests will be working towards the same goal of making a robot, does not mean that they will all be the same. I will encourage users to make variations on the design and to add details to make it more personal.
The instructions will include descriptions on how to add objects, how to use tools like the ‘move’, ‘rotate’ and ‘scale’ and even some basic tools in edit mode like ‘inset face’ and ‘extrude’ whilst modelling the body and limbs. Once a guest has completed modelling the body, head and limbs they will have the opportunity to add their own details for example adding buttons and screens on the chest or details on the face. Although this section will be left up to the guest, a 3D student (i.e. myself) will be on standby to help and inspire and ideas will be provided.
The instructions will be accompanied by images highlighting where the guest can find the tools mentioned in the instructions. For example, when the instructions tell the guest to select the move tool an image of the move tool button will be shown. The instructions will also be designed using the Transmedia branding guidelines. Below is an example of one of the steps accompanied by an image.
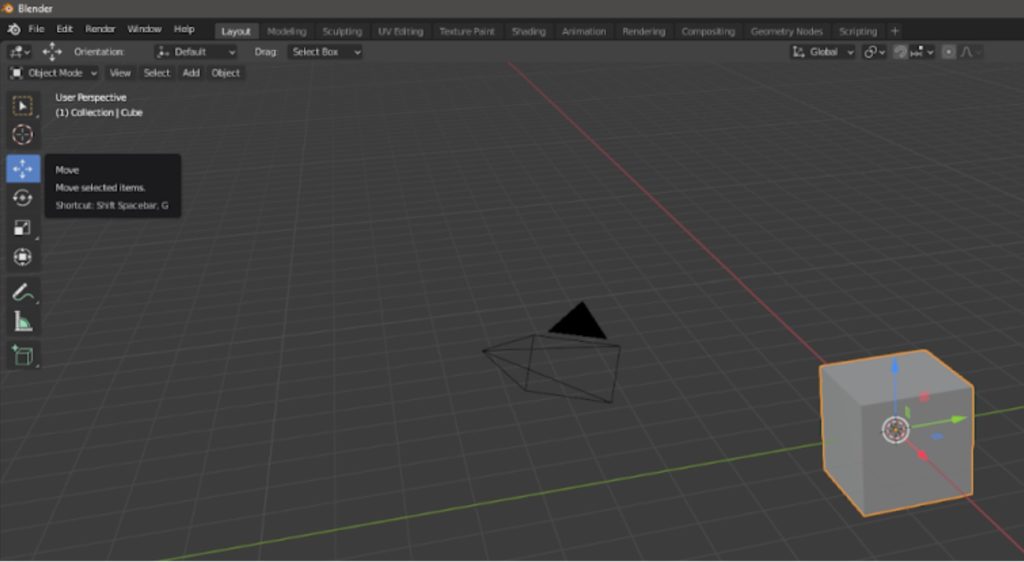
“To move the object select the move tool on the far left of the screen and make sure you have the object selected by clicking on it. Click and hold one of the coloured arrows and move your mouse. You will notice that your cube will move in a direction along a straight line called an “axis”. There are 3 axes, the x-axis, the y-axis and the z-axis. If you were looking straight downwards at your shape you could think of the x-axis and y-axis as the axis on a graph. Since graphs are two dimensional we need a third axis called the z-axis to move objects up and down.”
In summary, the instructions go as follows: add a cube, create an inset on the top face and extrude the inset face out to make a head. Next, add cylinders or rectangular cubes to use as arms and legs. During this process, the guest will also be told how to navigate the view around the model, how to scale, rotate and move and other key tools. I feel that navigation and the basic object mode tools are the first skills everyone should learn in Blender and this process teaches them effectively.
During these first steps, the guest is also taught some basic tools within edit mode. For a beginner moving from object mode and edit mode can be jarring due to the increase in the number of tools accessible. As well as this they will go from managing whole objects to managing the faces, edges and vertices that make them up. When I first tried blender, the first two tools I used were the extrude faces tool and the inset face tool. The purpose of these tools is easy to understand and the tools are easy to use which makes them a perfect introduction to edit mode. Using only these tools means that the guests will be able to manipulate only faces. This will be effective as learning to manipulate faces, edges and vertices all in one go could be overwhelming.
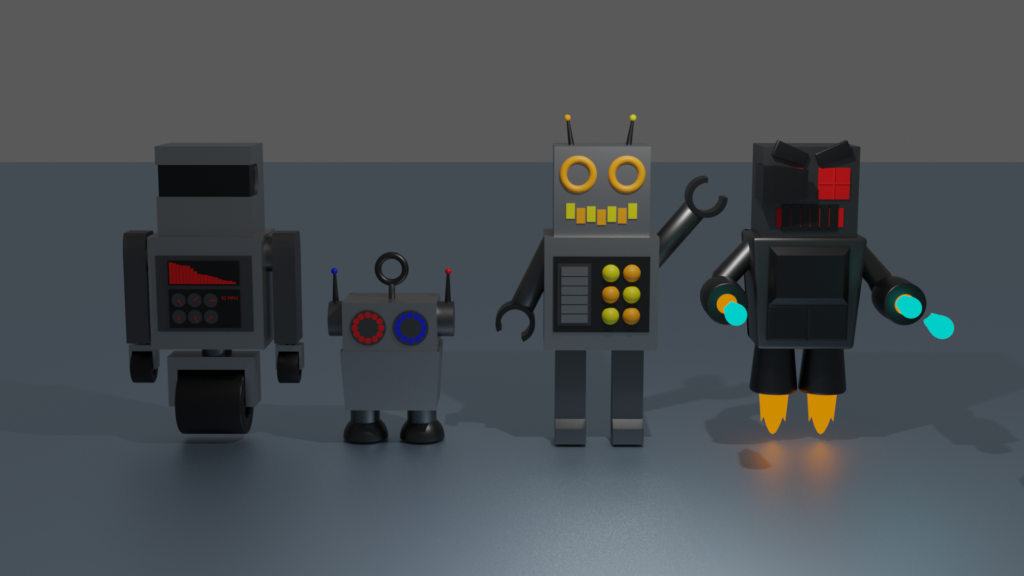
After the guest has created a blank robot, they will then be encouraged to use some of the skills they have learned so far to add details like a face, some form of hands, buttons and dials on the chest and much more. To help with this I have produced four robot designs, each with unique details. These will not only help inspire the guests to come up with creative, unique ideas but also let them know what is possible. At this stage, the guests may have ideas but may not know if it is achievable. Hopefully, these examples help not only inspire unique ideas but also keep those ideas within the realm of possibility for their skill level and the limited time frame we will be working with.
After the guest has finished modelling they will then be taught how to add some colour. This will involve showing how to change into material preview and how to apply a material to an object. For the purpose of not overwhelming the guest, they will be shown how to do this with the limited material options provided in the layout screen instead of the shading screen. The instructions will only show how to change the base colour unless they have something specific they want to achieve in which case I will show them myself. One exception to this will be the metallic slider which will be necessary to give the robot a metal appearance.
In the time between submission and the Transmedia exhibition, I will be converting my instructions into a suitable format with the Transmedia brand guidelines created by the transmedia team in Semester one of Year 2.